In this post I'm having a proper crack at Jupiter in Registax and Gimp, and documenting the process. The post is for process steps only - play with any and all parameters until you get the image you like! Below are all images of Jupiter produced from the same .avi capture. Which is your favourite?
I)
II)
III)
-------------------------------------------------------------------------------------------------------------
Processing steps
1) I took ~1800 (3 minutes) frames of Jupiter on Sunday 19th February 2012. The capture parameters are shown below. I used my Celestron 6SE with a Tele Vue 2.5x and my Orion Starshoot IV webcam. The video was captured with SharpCap.
[D-PEN]
Frame Divisor=1
Resolution=1280x1024
Frame Rate (fps)=10.00
Colour Space / Compression=RGB24
The gain was set very low - just enough to show a little detail. The image below is a single frame and demonstrates how the image appeared on my laptop. Still playing with the contrast/brightness etc, but set parameters that make the image look reasonable.
2) Open the video in Registax 6.
3) Align the image and hit limit.
4) Stack, set the wavelets and align RGB. Also play with the brightness and contrast..
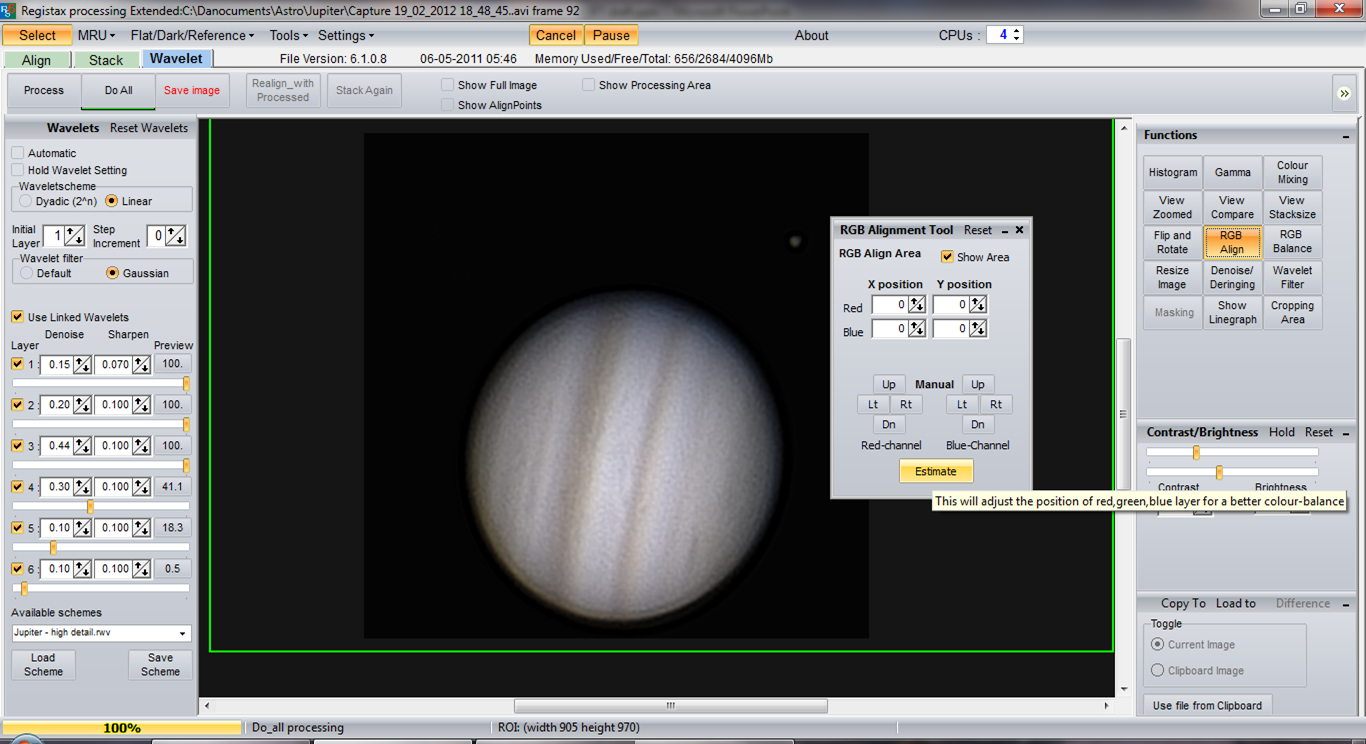
5) Might also help to play with the histogram..
6) Autobalance for giggles?
7) Final Registax image - save as a .png somewhere
8) Open Gimp and load the image. Adjust the levels
9) Adjust brightness and contrast
10) Despeckle the image (in filters)
11) Unsharpen mask (in fliters)
12) Adjust the colour balance
13) Adjust hue and saturation
Welcome traveller
This blog is very much written for my benefit. I've previously tried writing a blog, but I got bored as I had nothing particularly interesting to say. In this blog I will be mostly documenting my progress when it comes to astrophotography. There are many resources on the web for astrophotography, but crucial and useful details are often overlooked. This is a my astro-journal.
Showing posts with label Registax 6. Show all posts
21 February 2012
17 February 2012
Jupiter - a first crack
For my first post I thought I’d have a crack at Jupiter. I might put together a better tutorial on Registax 6 at some point, but here’s a first go to test the format of posting a "journal" of my steps.
I used my Orion webcam at the prime focus of my telescope – at some point I might cover the tips and hints to get a good focus /alignment and all that jazz. The webcam captured the image of Jupiter over a period of about 3(ish) minutes or approximately 1800 frames. The details of the capture are given below:
Resolution=800x600
Frame Rate (fps)=10.00
Colour Space / Compression=RGB24
Exposure=13
Brightness=31
Contrast=136
Hue=139
Saturation=129
Sharpness=119
Gamma=67
Below is an example of an 'untreated' Jupiter frame:
I then used Avidemux (I think) to convert the captured video file in .avi format to a series of jpegs – I’ll cover the capture and up-front processing another day.
In Registax 6, I used the following settings:
Align:
Alignment parameters: Min distance 5: min distance from edge 20
Intensity: 3x3 area; low 5; high 230 – 27 alignment points (APS) used.
Best frames: 1000
Stack:
Normalisation of frame intensity
Correct geometry
Stretch histogram after stacking
Wavelet:
Use interlinked wavelets
Parameters below:
The final image of Jupiter, with brightness levels tweaked in Gimp - will also cover this someday.
An improvement? - yeah, I think so but plenty more tweaking and learning to be done.
UPDATE: Used the same data and played around a little more with the Wavelets and number of frames. Key difference in the below image is that I only used 1000 frames to begin with to avoid planet rotation screwing up the detail.
Subscribe to:
Posts (Atom)